Special Message


Showing posts with label snacks. Show all posts

Wednesday, November 20, 2013

Steamed Yam Cake 芋头糕


It has been a real long break from blogging - my head had been buried in books in the past couple of months in preparation for a couple of exams, we made a trip back to Malaysia for my sis-in-law's graduation, I headed off for a reunion trip with my high school friends in New York City and Chicago soon after returning here, went for a college interview and thankfully, I got accepted!

I had the joy of hosting two of my friends who extended their stay in the States after the reunion, and it was just within the past week did I slowly resume cooking after months of going inactive.

One thing that one of them, Siew Hoon specially requested for - the Little Sheep Mongolian Hot Pot 小肥羊火锅. She has always been a huge fan of this, and it was thanks to her that I was first introduced to this Mongolian Hot Pot during our college years about 6 years ago. One of her must-have in the hot pot - yam! The remaining yam that did not end up in the hot pot - they ended up right here - steamed yam cake!


This is a recipe by Su-yin from Bread et Butter in her guest post Yam Cake Recipe (Or Kuih) for Rasa Malaysia. It was a love-at-first-try for me when I first made it a couple of years ago. Su-yin's recipe is simple enough - it comes in a simple ratio of yam:rice flour:water at 1½:1:2. They can be measured with just anything - a bowl or a cup, big or small. This recipe is as good as a fool-proof one as long as the ratio is right. I have, however, had my fair share of not-so-successful attempts, thanks to my lack of skill and experience. Some notes from those experiences of mine:

1. As much as it feels so tempting to load up on yam and dried shrimps, do not overdo them - or you risk ruining the cake's texture - it may turn out hard. You can, however, garnish as generously as you want before serving it.
2. Check that you have enough boiling water in the steamer to last through the steaming process. I ran out of water in the steamer once, and it totally ruined my timing.
3. Let the freshly steamed yam cake cool down completely before serving them. The shape holds better as they cool down - it makes cutting easier.


Sunday, May 26, 2013

Banana Cake


It's baking time!

Well actually, this banana cake featured here was done quite a while ago. And the photos have sat in my to-blog folder forever! So long it probably is about time to be baking this again, soon...

This, is a favorite of mine (oh and I have got so many other favorites! lol). My history with the banana cake started even before I actually started schooling really. An uncle of mine used to man and run a concession stand right in the middle of a huge golf course back in my hometown. That's where the golfers stopped to take a break from the game, stay off the sun (and sometimes rain) for a brief moment and have a drink and something light to munch on before moving on.


And kids being kids - with nothing more practical and productive to do most of the days - weekends especially, this golf course was where I used to spend a whole lot of my free time back then. My job description included helping around whenever and wherever help was needed (even that came optional) and being the boss during the brief minutes of my uncle/aunt/or cousin sisters' absence. But really, a bigger part - no, in fact most of the time spent was just me (sometimes with my brother) and my cousin sisters playing around in the nature - feeding the fish and turtles in the surrounding ponds and chasing the monitor lizards (yup, not even kidding here lol!).

All these came with this - which was the best part of all - that I could help myself to the endless food and beverages at the concession stand all day long! The banana cake was my big time top favorite! Bought freshly baked daily from a bakery shop in town, I would always remember the aroma of the bananas lingering around, noticeable even before you actually make an entry into the shop. And as of the last time I checked with my mom-in-law, the shop's standing strong to-date still. Which, just reminded me - I probably should make a stop for a slice of the banana cake there during my next trip back!


That marked the official start between me and the banana cake story. Over the years, I have had plenty other banana cakes everywhere. You get them everywhere in Malaysia, thanks to the great abundance of the bananas grown locally. Bakeries aside, they have been greatly manufactured and are actually sold in pre-packaged loaves (with long expiry), just like how the everyday breads are sold. In fact, that's where you can find the banana cakes - on the bread shelves! With such a vast selection in the market, there are easily the really not-so-good ones - essentially baked with a bunch of flour making up the volume and artificially flavored with some banana essence giving the taste, probably with a tinge of coloring to make it look all the more appealing too. And of course there are the real good ones - nothing artificial in their making - just like the one that made me fall in love with the banana cake at my very first try decades ago.


The sweet Pisang Mas (or the mini bananas) makes the best banana cakes - a fact made known to me by my mom. But the baby bananas are not something that we see much around in the market here. So I resorted to using the main and the most popular commercial variety sold here - the Cavendish (or better known as the Montel bananas in Malaysia). Left to ripen fully when it will have more brown spots than yellow, the banana is said to be at their height of sweetness bearing the strongest banana flavour, which then makes it all perfect for baking...

This recipe is one I adapted from Christine from Christine's Recipes in her post on the Banana Cake Recipe. And this marked my second attempt at this using the same recipe. This second time, I have made an adjustment calling for a slight reduction in the amount of sugar used and a reduction in the baking time as well. Those two, are of course subjected to personal preference and the performance level of different ovens. But this is one that I have got really happy with for now, so here's me penning this down as a reference to myself hereon, and to everyone else who may share the same interest in baking a homemade loaf of banana cake...


Just a final note here - if you noticed the darker layer at the bottom of the loaf of banana cake, to be honest I was a little concerned with that bit when I first sliced through the cake, thinking that I might have underbaked it. But nope, that part wasn't sticky, nor was it hard or having a texture any different from the rest. It tasted perfectly fine! So really, why a different tone? I honestly have not an idea. Anyone with any idea?

Anyhow, you should really try this for yourself - the cake's moist, so fragrant and soft it makes my man at home who is just an ok ok person with the banana cake fall for it even!


Monday, May 20, 2013

Crispy Curry Fried Chicken Wings 香脆咖喱粉炸鸡翼 Mom's Recipe #3


Picking up from where I last stopped in my Mom's Recipes collection, here's one of my big-time favorite - mom's fried chicken! This is one that I have fallen in love forever, probably as soon as I had started learning on how to nibble on chicken bones safely. A recipe that has survived through the decades of me growing up, it was the guaranteed center of attention in each and every birthday party that dad and mom had hosted for my brother and I when we were kiddos still.

A must-have on each of those occasions and a regular on other days a home, there is just nothing not to love about these wings.


Over the years, the recipe has been modified, detailed and perfected time and again. Mom has always been one who cooks by feel, so were all the changes that she would be making from time to time, all of which she obviously deemed as necessary (when I would have thought that it is already as perfect as it can get!). And as of the last time I checked with her just a couple of months back - this is her latest version of the recipe. A treasure now mine, it is now quickly becoming a favorite of ours here at home too.

A good accompaniment to go with rice, noodles or just a snack on its own, it makes a great dish to be presented on the dining table and even a greater candidate for a party food!


The making is relatively easy and yet the taste is never compromised. Deep frying done right with the right temperature and the right heat locks in the moist real well and marinating it well ahead of time - that's where all the flavors really do come from. So what you get in the end are pieces of fried chicken wings that are crunchy on the outside and perfectly juicy and flavorful on the inside.

And yes... they're finger lickin' good!

Saturday, April 6, 2013

Matcha Kasutera (Green Tea Castella)


Green tea castella - this is totally a love at first sight story! The first time I saw Eugenie's post Green Tea Castella (Kasutera) Marble or Zebra Japanese Sponge Cake on her blog, it literally took me no time to decide that this is it - hubby's birthday cake this year!

Eugenie's page comes complete with a video on its making - short and concise, fresh and charming. Which really is a plus! Especially considering the fact that I have never dreamed of making or baking anything this fancy but now finding myself in the kitchen with my very first attempt at making this. I have a very limited history with castella. Apart from it being my all three sisters-in-law's favorite cake, I know not much about this popular Japanese sponge cake. And other than those times that we would make sure that we got a couple loaves of these cakes in the Japan Narita airport when we had a layover there on our way back to Malaysia, I have only had a couple other really countable times that I had had this elsewhere.


So making this was something totally new to me. And when you are making it for someone special and for some momentous occasions, there goes the stress building up, naturally. But it rounded up with a pleasant surprise - with all the hassle over and the cake done at the end of the day, it has then officially made me a fan of castella lol.

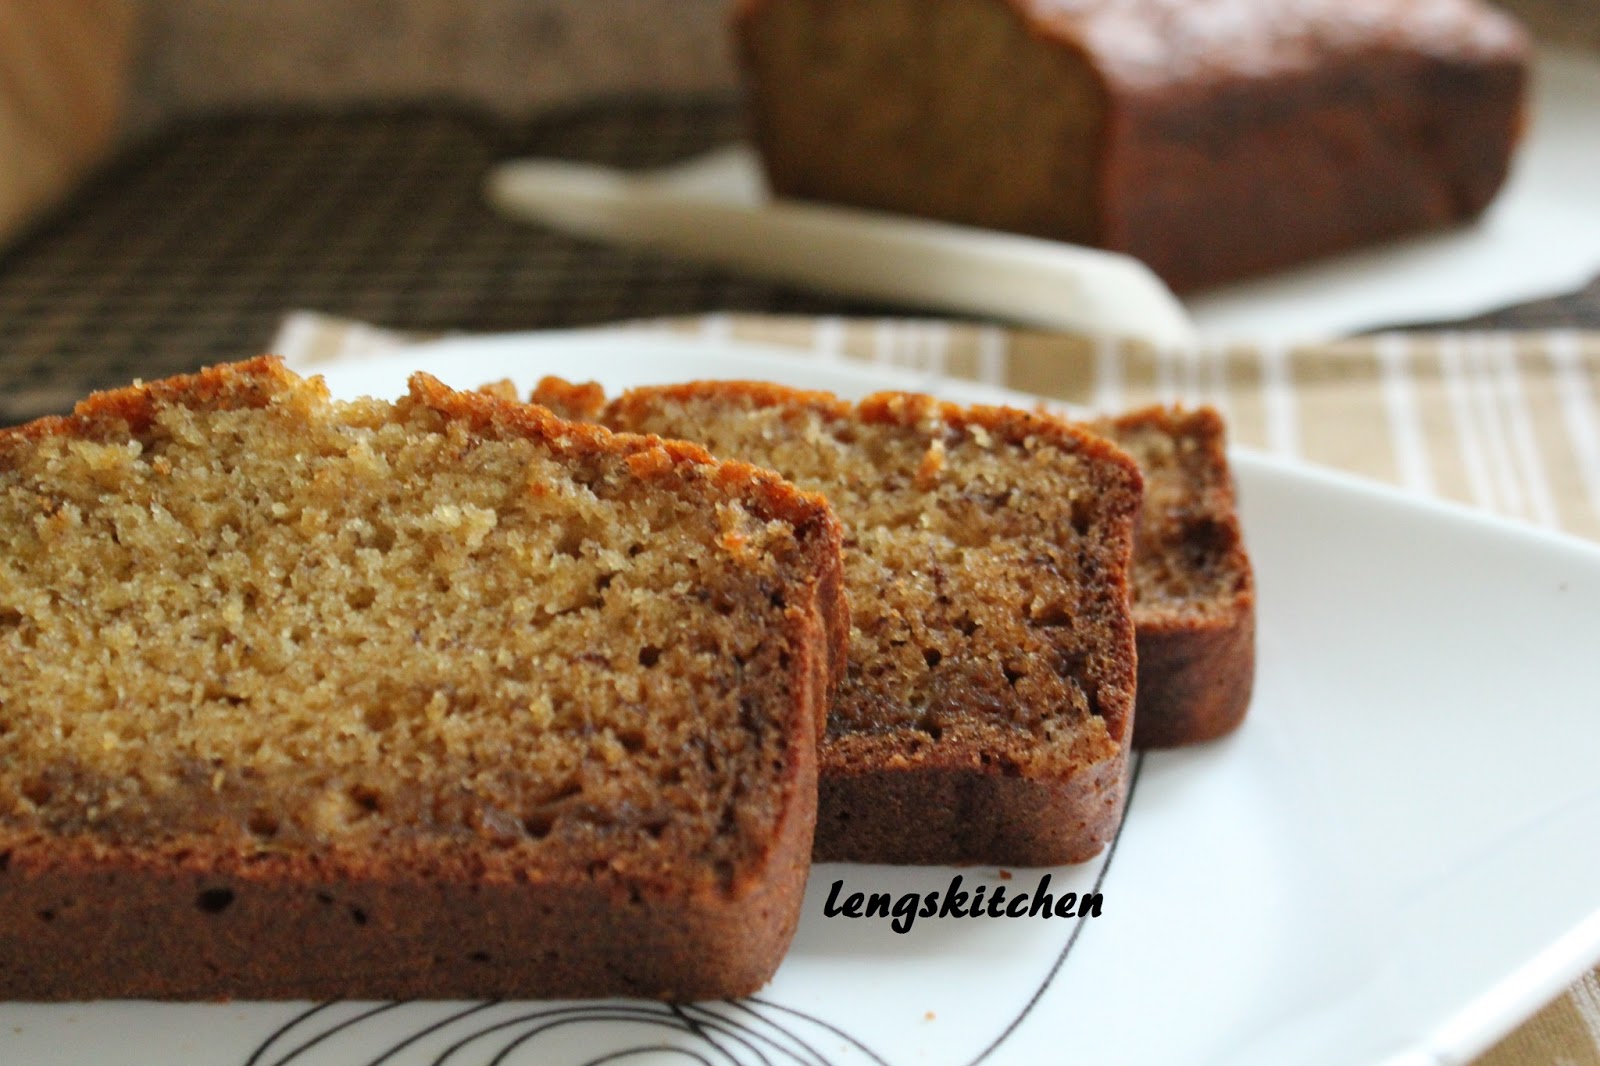
Light and delicate, moist and fluffy - it makes such a pleasant dessert that goes perfectly with a cup of hot Japanese green tea. And for a change (and a break from the super buttery Butter Cake that we last had not too long ago), it's rich without having the need to have butter, margarine or oil; and it's soft (and a little crumbly) without having to call for any leavening agents in it. Sweet but not overly so, I believe that this will now be a regular for us at home...


With no intention to make any changes to Eugenie's recipe, I set out trying to get everything that was needed for the making but still found myself short of two - the acacia honey and the cake pan with the specified measurement. Instead of the recommended acacia honey (one with a mild and delicate floral taste best suit the castella), I settled for the most widely available honey in the market - clover. I wouldn't be able to tell how one is better than the other (yet!) but I have got to say that I'm more than happy with this clover-version of castella. But the hunt will continue! And someday I'll be back with some extra notes when I have finally secured some acacia honey in hand.

Not having the right pan (one of a real adorable size 6.3"x2.4"x3.1"), I resorted to making some castella mini cakes using the muffin pan instead, the alternative as suggested by Eugenie in her post. 9 green tea castella mini cakes (only 8 shown, the lucky #9 went down my tummy as soon as it was ready lol) and a little decoration and there it goes - all ready for the mini celebration!


And that started the love story - one with me and the castella...

Having done and tried that first batch of the castella mini cakes, I had since really looked forward to making another - I assumed as soon as the mini cakes get polished off. And the time is here! I haven't got the right size of pan still; this is done using what I have in hand - the 9.25"x5.25"x2.75" loaf pan. With that, I tripled the amount to each ingredients - more than enough for just a loaf of castella but waste them not! The rest can be made into more of those mini cupcakes... a bonus!

Spreading the layers nice and neat takes a little patience (and practice too), pretty much like an art itself. In fact, I think the same elements apply well to the whole making in general. Sadly, my block of castella didn't turn out to be perfect. It browned pretty well on the top, but it wasn't exactly a smooth one - not even close to perfection. So pardon me with this not-so-perfect castella of mine this time around. "It adds a little human touch to the blog", says hubby... lol.


Doing a little more reading post baking, I probably know (I think!) what and how I should have done differently back then. Instead of letting it rest upright coming out of the oven, turning it upside down would probably be wiser a move to make. I guess it's pretty much the same with how a chiffon cake should be handled once it's removed from the oven. I'll be glad to have someone to enlighten me on this! That said, there will definitely be a next time for me with this part done right (and hopefully it IS the right thing to do lol). And when that happens, I'll be sure to be back with more updates!


As for now... I shall just sit back and enjoy this heavenly dessert while they last.

Thursday, April 4, 2013

Malaysian Chicken Satay


Continuing from the previous post on the Satay Peanut Dipping Sauce, here comes the chicken satay! Easily any Malaysian's favorite, this is by far hubby's big time favorite. He would crave for these skewers once in a blue moon, but it has never crossed my mind to actually make my own batch of chicken satay at home. Back then I didn't have what I needed in the kitchen - I haven't got a set of mortar and pestle; and I haven't got a good spice blender either. So anything with spice was basically out of the question in my culinary world. So much so that I have never bothered keeping that many different types of spices at home.

the extensive ingredients in picture

That aside, looking at all the many different recipes available online made it all worse - they just put me off even further. Unlike plenty other Malaysian food that I so love and adore, making this chicken satay uses a lot more spices than any others. There are the dry and pre-packaged ones that you can still get (with some luck and a little time looking for them) from either the Chinese grocery stores or the Indian grocery stores; but the list also includes a number of other fresh spices that took me a real long while before I finally got to seeing them in one of the Vietnamese grocery stores. So, it is indeed one with quite a lot of preparation, before the cooking even comes into the picture.


But of course, those were just me and some of my personal problems (or excuses lol). A close friend, Siew Gee (the very same friend who makes awesome Chicken Rendang) - she makes superb chicken satay! And the best part of it - she does it even without necessarily having all the ingredients needed in hand. She's one who is perfectly comfortable and competent in having those in the recipe easily and readily substituted wherever and whenever she deems fit. And as much as I would love having her special recipe for this chicken satay, she works the way most professional cooks work - there's never a written recipe in black and white; she goes by experience.

You will love her chicken satay if you have tried it!


The idea of going against my own norm and finally giving this spice-laden a thought came as I was getting hubby's birthday plan laid out. Having not had them for quite sometime, I thought it should fit pretty well into the picture. Provided it turned out good, that is.

Getting all the ingredients ready was not too much a problem now that I have got them figured out as to where they are each available in which different places. But just like the Satay Peanut Dipping Sauce, it was not having a ready-for-use recipe in hand that really had somewhat made it rather complicated for me.

This is a recipe that I first stumbled upon in a blog by Selera4U. The post came with a link (which sadly no longer works) to another source. Searching online, it traced down to a recipe originated from the one by NoorMasri. A search for this recipe of hers revealed that it has been used and featured by many other bloggers everywhere ever since it came about online back in 2006. Not exactly sure if she keeps all these brilliant recipes of hers anywhere online that I should have credited instead but this probably is the best that I can do on my part having adapted hers and made my own.


Commonly served with cucumber, onion wedges and nasi impit, this is easily almost a Malaysian pride. Not exactly a breeze with its making I would say, it involves a rather long preparation time in fact - from getting the marinade ready, getting chicken marinated overnight preferably, skewing them the next day all the way to getting them grilled - indoor or out. But this first try of mine turned out great. All the effort paid off - the birthday man had a real great time polishing off one skewer after another. And a happy hubby with a happy tummy makes a happy wife lol!

And the good news (at least to hubby) is that there'll definitely be a next time having done this once (which hopefully will be a lot less chaotic then). But I will probably make sure that the next time will be done in a weather well enough for outdoor grilling instead of getting them done indoor. Because honestly, nothing quite beats a batch of chicken satay with some real smoky flavors as they get basted in oil steeped with crushed lemongrass and then grilled to perfection.


Friday, March 22, 2013

Stir Fried White Radish Cake 炒蘿蔔糕


Stir Fried White Radish Cake 炒蘿蔔糕 - it goes by plenty other names. There's the Char Chai Tau Kueh 炒菜头粿 and there's the Char Kueh Kak 炒粿角 too. Honestly, I have not an idea how exactly they differ from one another. I would guess different communities in different regions with all the local influences over time must have adopted different names at one point or another. But all in all, I really do think that they are essentially the same Stir Fried White Radish Cake 炒蘿蔔糕. They probably just differ slightly in terms of their cooking styles and their final presentations, in which each is made and tailored to suit the locals.

Perhaps someone cares to enlighten me on this, pleeeeease?


Variations in name aside, there is a couple different variations in how they are stir fried too. There's the plain white version, and there's the version which incorporates the use of dark soy sauce, and hence a version with a darker hue in general. Some are loaded with bean sprouts and chives; and some simply stir fried with eggs and nothing else. Of course, there's also the very basic version - no extra ingredients, just cubed radish cakes first pan fried and then stir fried over a high heat with some light seasonings.

My favorite of all would be the version stir fried with Chai Poh (preserved turnip) 菜圃, loaded with bean sprouts, chives and plenty of chunky eggs. Yes, huge huge bits of eggs... mmMMmm lol. And one that comes with a tinge of dark soy sauce (I don't particularly fancy the plain white version, but of course not the one that's all too dark beyond recognition either). Oh, and of utmost importance, the cubed radish cakes will have to be pan fried prior to getting stir fried. Crispy exterior, soft and fragrant interior - PERFETTO!

pan fried radish cake, preserved turnip, egg, bean sprout and chive!

This Stir Fried White Radish Cake 炒蘿蔔糕 has gotta be one the few favorites of mine that I have truly missed ever since I moved here. I have not heard or read about a place actually serving this here where I live, let alone actually eating it here anywhere nearby. So each time the craving hits, my best option would be to make do with the pan fried radish cake commonly served in dim sum restaurants.

Same yummy stuff, same yummy origin, but but but - they are somewhat different kinds of yumminess!


So make my own it is then! The steamed radish cake recipe was one adapted from Yi at Yi Reservation on his post on Dim Sum Classic – Turnip Cake (蘿蔔糕). The stir fried part was one slowly developed over time based on my very first trial (which failed big time btw! lol). Took me a couple more times to experiment with plenty of changes in between, but it's all so worth the time and patience in the end.

My wish for now - is that the craving doesn't come hitting me (AGAIN!) anytime soon. lol.

Saturday, March 16, 2013

Butter Cake


It feels as if the basic to cake baking always starts with making the butter cake. I know it was the case for my mom, and it certainly was for me. I started as an assistant to my mom even when I was a kid still. And I think I actually took commands from my mom pretty well back then lol. That was where I got my very first exposure to cake baking - with weighing, sieving, beating and mixing. And those pretty much summarized my experience in cake baking prior to my very first attempt in baking a cake, all on my own ever.

That, started pretty soon after I moved here, motivated by none other than the endless cravings that tagged along with me as I made the choice moving abroad lol. Mom has an exclusive butter cake recipe that she has been using probably for decades now. No, not this one featured here, but someday, someday I'll make sure that that specialty of hers gets featured here.


This recipe is one I adapted from Amy Beh at Kuali. It marked the first ever baking recipe that I have actually noted down in my personal recipe notebook, tried and tested a couple of times along the journey of my cake baking here.

Minor modifications were made here and there as I baked it again and again from time to time. Some intentional, some not. Specifically, the amount of sugar used has been reduced intentionally since the very beginning and evaporated milk was used in replacement of the fresh UHT milk specified in the original recipe. Unintentionally (and as silly as it may sound), I omitted the salt, again for a silly reason - I ran out of unsalted butter and resorted to topping the rest with the salted butter and thus explained the absence of any additional salt. Well surprisingly, it turned out yummy!


So this final edited version to the original recipe (with all the changes in between - intentional and unintentional) has been one that I have been sticking to for probably a year plus now, now a favorite of ours at home and among some friends who have actually tasted it too.

Monday, March 11, 2013

Sesame Orange Shrimp 橙汁芝香虾球


Revealing... the four seasons Chinese cold platter 冷盘! Well this is not a post particularly highlighting the platter itself, but I thought I could just make this a little continuation to the previous post on Scrambled Egg with Glass Noodles 粉丝炒蛋. The idea of making this Sesame Orange Shrimp 橙汁芝香虾球 a part of the huge platter came from Wendy at Table For 2..... or More, pretty much a love at first sight thingy really. A dish with an orange hue so pretty, the whole dish is made simply appealing with how well tangy pairs with sweetness, and the idea of fresh and springy shrimps fried to a perfect crisp.

This recipe is a crossover between two different recipes; the sweet sauce with a tad of tartness is a creation of Wendy herself; the crunchy coating is one I adapted from Bon Appétit magazine of the recent March 2013 issue in the recipe for Parmesan Chicken Cutlet by Jenny Rosentrach and Andy Ward.


My first attempt at making this was done solely based on Wendy's recipe - both its batter and of course, the sauce itself. And that was exactly what went up onto the cold platter 冷盘 that very day of my self-declared huge home project. The shrimps really did shine. The only setback would be the crunch that came with a relatively short half life. But that could be totally a personal case of mine, considering the fact that I had to juggle between making this dish and some other four different dishes for the platter, all within the same few hours. But it went well all in all; we had a big feast that night and the platter was wiped cleaned nevertheless. lol.

When the Bon Appétit magazine reached my doorstep sometime two weeks ago, the attraction to the crunch portrayed in the featured breaded chicken was almost an instantaneous one to me. Took me no time to get it bookmarked! lol. And have I ever mentioned anywhere that hubby makes a superb chef at home? Oh yes he does! A couple more days later, he made it a point to make his renowned spaghetti carbonara with this parmesan chicken cutlet on our date at home. WOW! The crunch was simply amazing!

hubby's renowned spaghetti carbonara... DELIZIOSO!

Well to cut a long story short, that was how the idea of matching the two recipes came about. Sealing in the moist and sweetness natures of the shrimps, the flour-egg-breadcrumb coating creates a perfectly satisfying crunch to the dish. A different batter, a different mouthfeel, same great satisfaction!

And now back to the four seasons Chinese cold platter 冷盘; it's pretty much a compilation of some different dishes that have been featured at one point or another in the blog, only each prepared in a cut-down portion size to fit the platter. They can be anything really; deciding on what goes onto the plate is almost like an art of pairing, mix and matching itself. And here's the version that we had for our first Chinese New Year reunion dinner celebrated here at home just about a month ago.


In no particular sequence, they are...

Wednesday, February 20, 2013

Peanut Cookies 花生饼 - Chinese New Year Series


My cookie baking history started with these peanut cookies. Back then I had months to spare before the start to my Uni years, so I got the chance to explore the baking world a little. Peanut cookies topped my to-try list then simply because of the two huge peanut fans I had always had at home - my parents. Apart from the hike in electricity bill over the months that I suddenly got so into baking, dad (my biggest fan then) obviously had no complains with the little enthusiasm kicking in me, despite it being a short-lived one lol. He was the first to peek into the kitchen and check on me (or rather the menu for the day to be exact lol) while I was busy whisking, mixing and baking away. Needless to say he was always the first to have a try at my baked stuff as soon as they were out and ready. 

Since then I had had a couple more experiences with the peanut cookies. Each time was itself an experiment with different recipes that I could get hold of - my aunt's, the cookbook's and others online. I had been the good baker - making these from scratch, sweating over roasting and especially skinning the raw peanuts; I had also been the mediocre baker where I started my production line straight with a batch of readily roasted peanuts lol.


You probably will have to try both versions to taste for yourself if they really do differ and especially if the extra time and effort needed to make them from scratch is indeed justified. I personally do think that there's always a little extra and something great with those made from scratch that somehow are missing from those readily roasted ones. But having said that, oh yes I would do it the easy way still at times. Well this is exactly one of the times lol. Honestly I wasn't that keen with airing them in the yard in this freezing cold weather. But if you have got enough time and patience (and a good weather lol) to spare for the day, by all means do try it the good baker way. It will be a really rewarding experience!

If you are using the readily roasted peanuts, get those unsalted ones and be sure that you get hold of a real good and fresh batch of roasted peanuts to begin with. And if you are making them from scratch, this is how I had done mine in the past.
  • Dry fry the peanuts in a wok over a medium heat. Keep the stir frying motion going to make sure that the peanuts have a fair chance to get in contact with the hot wok at all time. The cue to stop is when the fragrance of the peanuts is apparent and the skins start turning dark (some a little burnt and some with the skins start flaking off naturally even) revealing nuts with a darker hue within. 
  • Transfer the nuts into a large colander. You can use the huge round plastic food cover - the "tudung saji" (my favorite lol).  That always gives me the best surface area to work with. Plus the holes are big enough for the removed skins to pass through easily retaining just the nuts.
  • Move outdoor. We need a little wind here (and some fresh air for you too lol). To get the skins off, you will need some rubbing in between the peanuts. But with them still hot from the wok, press and rub them against the colander with a spatula. You can switch to working with hands once they have cooled down enough. With the skins so dry and flaky from the dry frying, they should come out rather easily. 
  • Shake and toss them high every now and then to allow the wind to blow off any skins removed. And to remove those skins nested at the bottom - pour the peanuts carefully and slowly into another huge colander from a distance high up while the wind works its way in blowing the skins away. Repeat until you have most of the skins off. 


This recipe is one adapted from the recipe by Wendy at Table For 2....or More. Wendy noted in her post that the relatively large amount of sugar in her recipe is essential in binding the dough together well. But knowing well the sweet tooth I have in me and how it can only tolerate that limited amount of sugar, I had chosen to lessen the amount of sugar used still. In turn, I added a bit more oil to get the dough to the right texture. Halving her recipe, I made about 155 pieces of cookies in total. Not only do these peanut cookies taste so peanuty and smell all so fragrant, they actually melt in your mouth!

Sunday, February 17, 2013

Ngaku (Arrowhead) Chips 炸芽菇饼 - Chinese New Year Series


Woohooo! Ngaku chips in d' house! lol. Finding the arrowhead here in the Chinese grocer would be the biggest discovery I have had so far in terms of my grocery shopping experience here where we live. Not exactly those large and pretty ones that often come sold in bulk with the stock replenished just so often back in Malaysia, those sold here came in a very limited quantity. So yea, they come and go in a snap! But hey, it's ngaku in Michigan! And that gets translated to some ngaku chips at home! Plus it's technically Chinese New Year still! They collectively make quite good a picture on the whole, do they not? lol. Contented with the only option I have got, I got myself about 2lbs of those. Happy happy me!

Ngaku 芽菇 or chiku 慈菇 in Chinese and arrowhead in English, these are seasonal starchy tubers with a natural hint of sweetness in them. With a texture very similar to potatoes, probably just a little grainier, they make a real good candidate for chips. Their existence in the market and especially during the Chinese New Year wasn't made known to me until I was in my teens when mom bought home a canister of the ngaku chips and got us all addicted to the chips lol. It was such an immediate hit! But they sure didn't come cheap. Soon mom started making her own having gotten plenty of tips from all the housewives and homemakers friends of hers in the wet market she frequents.


A real simple recipe with just the ngaku, some salt and enough cooking oil for deep frying, the challenging parts about making the ngaku chips lie in getting them evenly and thinly sliced and frying them to perfection with the right heat. Slicing has surely been made easy with the use of a good mandoline these days. But time consuming it still is nonetheless. As with the frying, patience will be all you need apart from getting just the right heat. Applying the same rules of thumb with all the deep frying delicacies, using too low a heat and you'll turn them into chips laden with oil; too high and you will get chips with burnt rims and the center of the chips mostly undone in the end. But once that gets under control, everything else should come easy.


Monday, February 11, 2013

Hokkien Spring Rolls 福建春卷 - Chinese New Year Series


Also known as the Lor Bak 卤肉 to some, this has always been a must to me on Chinese New Year. I'm not exactly sure what the significance is; I just grew up getting used to the idea of having them as part of the meals on big festive seasons as this, probably a culture and tradition of the Hokkien. Oh yes, I am a Hokkien! lol. But on second thought, these spring rolls do seem to fit into the picture rather well. In China, the Chinese New Year signifies the beginning of the spring season and thus it is also known as the Spring Festival to some. Spring rolls in the beginning of spring, sounds kinda perfect in a way! lol.

These spring rolls is one that makes you hard to stop at just a single bite or piece. It always leaves you keep wanting for more each time! Well it is to me lol. There have been plenty of variations as to how they are done. At least I have seen all my relatives having their very own versions. Similar but not totally the same, they however carry the same concept - marinated minced meat rolled in bean curd sheets and served deep fried. Some are made with pork while some opted to have the shrimps added in. There's a version with just the meat rolled in; there's another version with bits of vegetables incorporated in it - water chestnuts, carrots, spring onions or the onions maybe. And to complicate matter a little further, everyone just seems to have their own seasoning formula! Complicated or flexible, I think the terms go interchangeably in this matter lol.


Starting our very own family tradition here this year, I made it a point to include these spring rolls in our menu too. The good thing about these spring rolls is that they can be made in a relatively large batch and frozen them up for later consumptions. So when you have had that done and stored away in the freezer safe and sound, knowing that will hopefully leave you with a little peace of mind as you continue getting yourself busy working on the plenty other meals throughout the Chinese New Year celebration. It sure did work on me! lol.

To my many readers who have witnessed my progress and development ever since I started this blog, I thank you so very much for the endless support to keep me going! Even that seems so inadequate.

And particularly to those who celebrate the Chinese New Year, Happy Chinese New Year!
 新年快乐,心想事成,蛇年行大运!


Thursday, February 7, 2013

Almond Thins 杏仁片脆饼 - Chinese New Year Series


These almond things are so unbelievably addictive! I fought so hard to refrain myself from nibbling on them the moment they are out of the oven. I went all "Hmm, this looks a little too brown for the jar of cookies. Mine it is! And that too, I think... nom nom nom" lol. At the end of it, each hue of brown just seems like they fit my appetite much better than they fit the final jar. Seriously! It is that bad! Totally unusual! Other times of any usual day, I would have spent so much time working on it and seeing it I hardly would have any appetite left for those baking stuff, at least not until the next morning. This is such an exceptional case!

I have never been a real big fan of this. I like having them when I actually have them, not particularly missing them when they have gone missing lol. But this time around, I think I am pretty sure that I'll be adding this to my list of favorite cookies. And the fact that it's one totally doable at home - that is a huge plus! A little patience and a little time if all that you need to get these crisps done. The credit goes to Lee Ping from Stream in the Hip Desert 新荒漠甘泉. Simple ingredients with just the almond flakes, egg whites, oil, sugar and flour, you'll be amazed with how well they blend with one another to give you a batch of relatively healthy, crispy and totally addictive almond thins. A snack simply made perfect for the festive season!


My two cents' worth:
  • Fresh! Fresh! Fresh! Get real good quality of almond flakes with freshness at their best! That being the key ingredient to these almond thins, a good batch will have won you half the battle.
  • Get it buttery! If you wanted them a little buttery (ooooh butter is yummy lol), have the oil substituted with melted butter instead. I may just do this the next time I'm at this again.
  • Spread it thin! I had to make this twice before I managed to get hold of the flow in its making and got myself to the right thickness (or thinness lol). The first time I had the batter spread out on one single 10"x5" baking sheet. It seems to fit just so perfectly. But nope. As little as the batter seems, it needed a lot more space than that. This second time, I divided the batter into two batches. That gave me plenty of space to spread them really thin, paper-thin! Voila! Perfect almond thins, brittle, crispy, you name it! Double time needed yes, but the pleasure at the end of it had also more than doubled! lol.
  • Single layer of flakes. As much as a mouthful of almond flakes in each bites seems like a big WOW, limit the flakes. Almond flakes spread out evenly in a single layer gives you a real thin layer, a little more elegance in its final appearance and of utmost importance, a more even color and time needed to bake them in general.
  • Protect the sides! The sides and corners of the batter will be first few areas to turn brown. Don't let them go to waste (they are so precious! lol). Cover it up loosely with strips of aluminium foil before you put them into the oven.


Let's yummmmmm away....

Tuesday, February 5, 2013

Beehive Cookies (Kuih Rose) 蜂窝饼 - Chinese New Year Series


More Chinese New Year cookies!!! Beehive cookies, honeycomb cookies, kuih loyang, kuih rose or we call it "kueh lobang" (in Hokkien) even, seeing these cookies makes the perfect indication that that the big festive season is just around the corner. My maternal grandma loved this, mom and all her sisters loves this and I loooove this. Sounds like something to do with the XX chromosomes eh? lol. Mom is not one that particularly likes baking. She easily gets impatient when it comes to baking. These beehive cookies are probably the only type of cookies that I have seen her making in our kitchen, apart from a couple of other cakes all of which are specialties of hers. So some years when mom's into the cookie-making mood, we'll be having this readily in the kitchen. Other years, we would just buy them!


This brass mould was a real treasure of  my maternal grandma. It was passed down to mom for a good decade or two and when I moved here, mom made sure I brought it along with me. So old it sure is. But with it you can see how sturdy, strongly built, precious and especially meaningful it is to me. And of utmost importance, it never disappoints! So good I have never really considered looking for a brand new, shiny, perfectly polished moulds in the market even if that means that I can expect to spend a lot of time working with just one mould in hand.


As much as we both love this, we couldn't help rambling and grumbling each time we had to buy these cookies. Well yet we did it time after time, again and again lol. For some really basic and simple ingredients used in its making, the hefty price printed on the price tags do make it a little hard a fact to accept. But then again I have to agree; they do have good reasons to be so well priced after all.

Making this is like a battle against the heat. Physically you will have to endure the heat as you stand in front of the wok patiently frying them away - another reason it always drives mom away from the idea of making this back at home. I was spared the agony here; the freezing cold weather outside made it all so nice for me to be working with some heat indoor. And then comes the battle of heat between the batter and the oil. You will have to spend a moment experimenting in the beginning and adjusting thereon. I made 44 pieces in total in this batch; 3 got beyond recognition (way too browned - the hot oil won hands down intimidating the batter lol); another 2 was kind of lacking in presentation and appearance (the batter and oil started getting used to one another nevertheless lol). But once you have managed to reach that equilibrium between them, the rest of the story is about maintaining the flow and keep the connection steady in between the two.


This is my fourth time making these beehive cookies and it comes with plenty of trials and errors going on still. Using a recipe I adapted from My Kitchen Snippets on her post on Kueh Rose/Kueh Goyang this time around with just some minor adjustments, this recipe is by far the best recipe that has given me a batch of beehive cookies that really look like what their name suggests lol, not forgetting the promised crunch and mouthfeel that come in a package. Look out for the few extra notes that I penned down alongside the methods as they get laid out. Some simple points, but they are exactly the little details I will usually pay attention to for a batch of nicely shaped beehive cookies (although I do tend to forget them myself and thus a need for some self-reminder here).


Related Posts Plugin for WordPress, Blogger...